Setup SSL with Static S3 Blog and Site
We really need to start running more and more sites behind SSL. I have always been a fan of increased security even for things that don't need it.
"I have nothing to hide, but you don't need to know that."
I live by that philosophy. As such I want to run all of my sites behind SSL whether it is needed or not. Therefore running my static blog, and sites, need to be secured with SSL. With all the fun configurations you can do with AWS these days you can easily setup a free ssl cert, and run your site on CloudFront making it secure and super fast. All you do is host it on an S3 bucket, and do some connecting of services.
I currently run two static sites in the way described below, and my bill looks to be averaging $1.50 per month. I don't get a lot of traffic, yet, but I don't think it will get too expensive for a while. Besides for AWS it is less about making money on you from s3 storage as it is to get you into the ecosystem ;).
Contents
There are 4 main, and several minor, segments to setting up your static site behind an SSL certificate. You create the buckets, configure your certificate, setup CloudFront, and finalize your dns settings.
The following is a screenshot'd walk-through of setting everything up. I set up my farms website and took pictures so you could see the process.
Create and Configure S3 Buckets
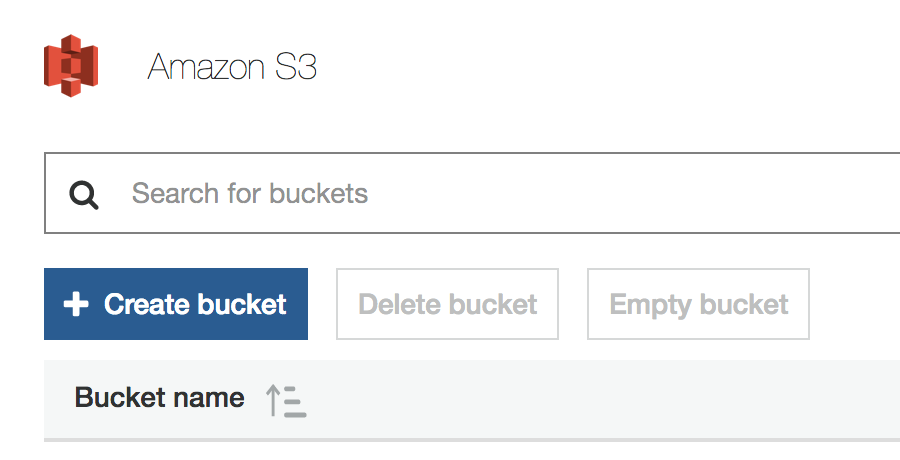
First thing you want to do is creat your buckets. If you go into S3 you will see a button similar to the image below.
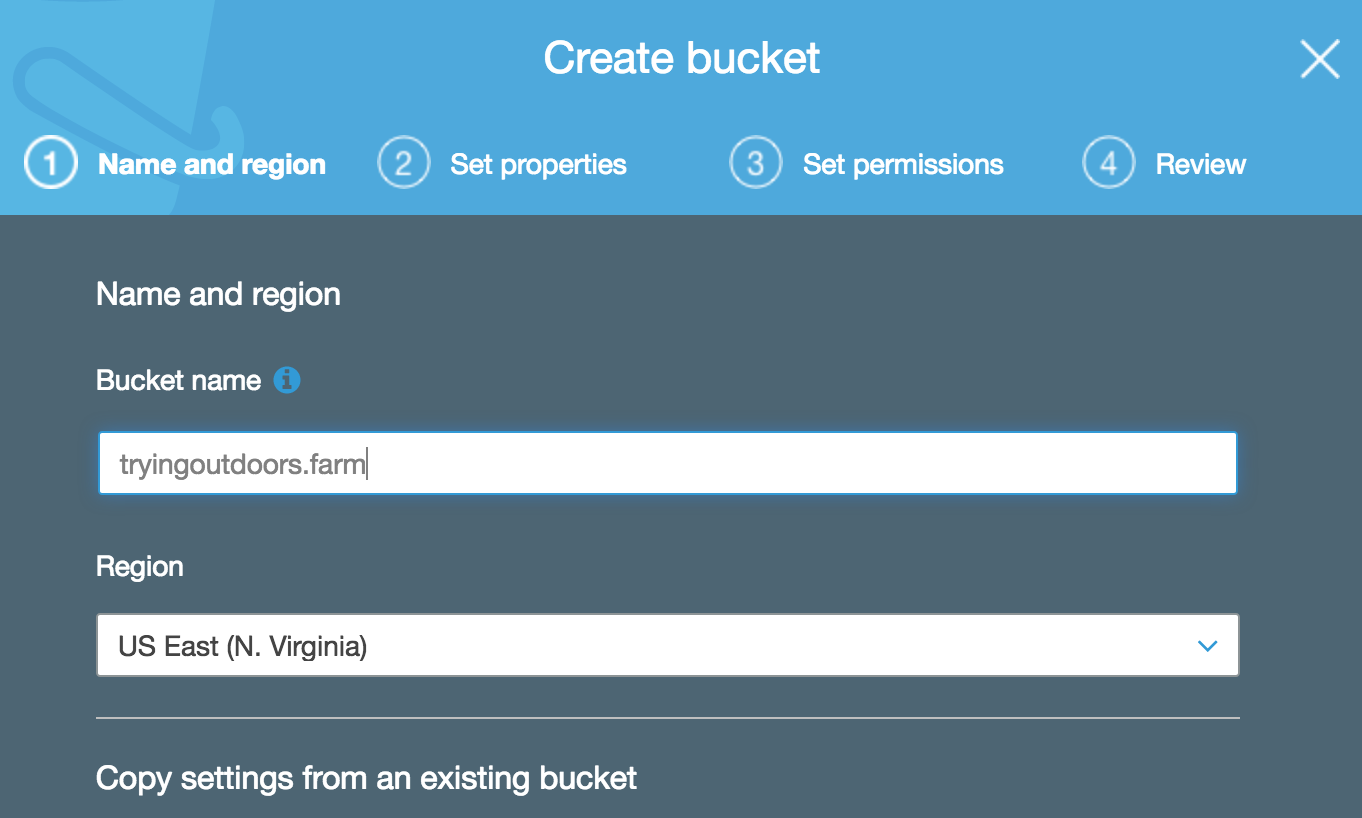
When you click on the button you will get a modal. Here you put in the name of the bucket. Generally people put the name of the url as the bucket name, in this case it is tryingoutdoors.farm. Leave it as US East (N. Virginia) they enable stuff by default other regions do not. I have read of instances where parts of this don't work out of the box outside of US East. If you are worried about regional speed and distribution CloudFront should solve that issue.
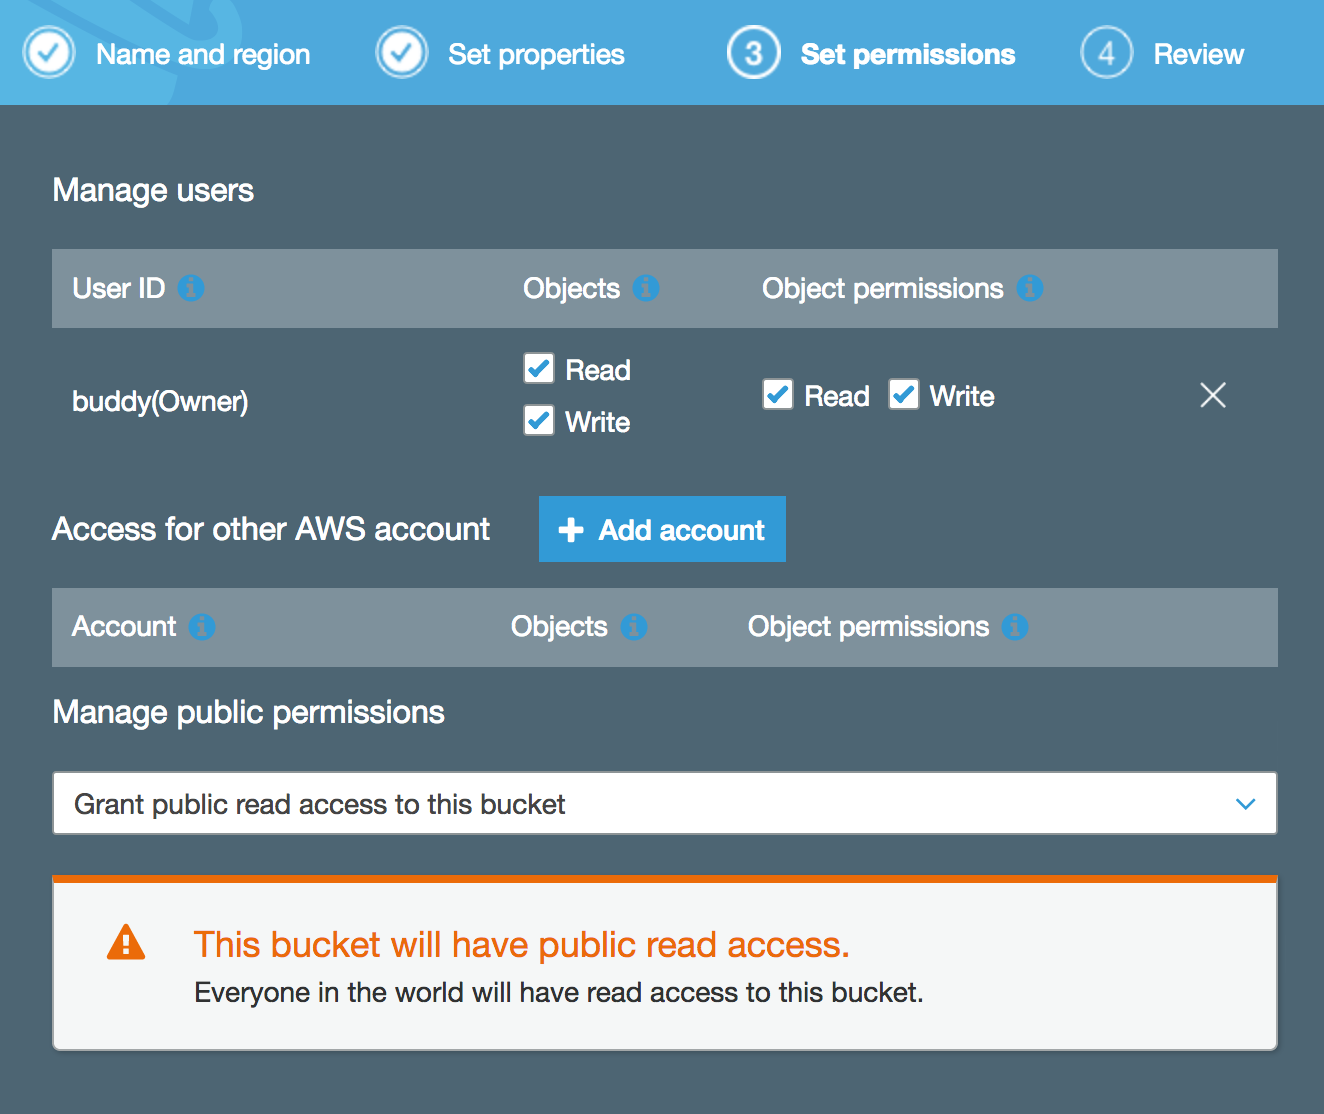
After you set your bucket name you will need to set the permissions. Set these to public for everyone to read. It does give a warning about everyone being able to read content from this bucket. Normally, you would heed the warning and not do this, but we know, and are aware, we want to make all content public in this bucket.
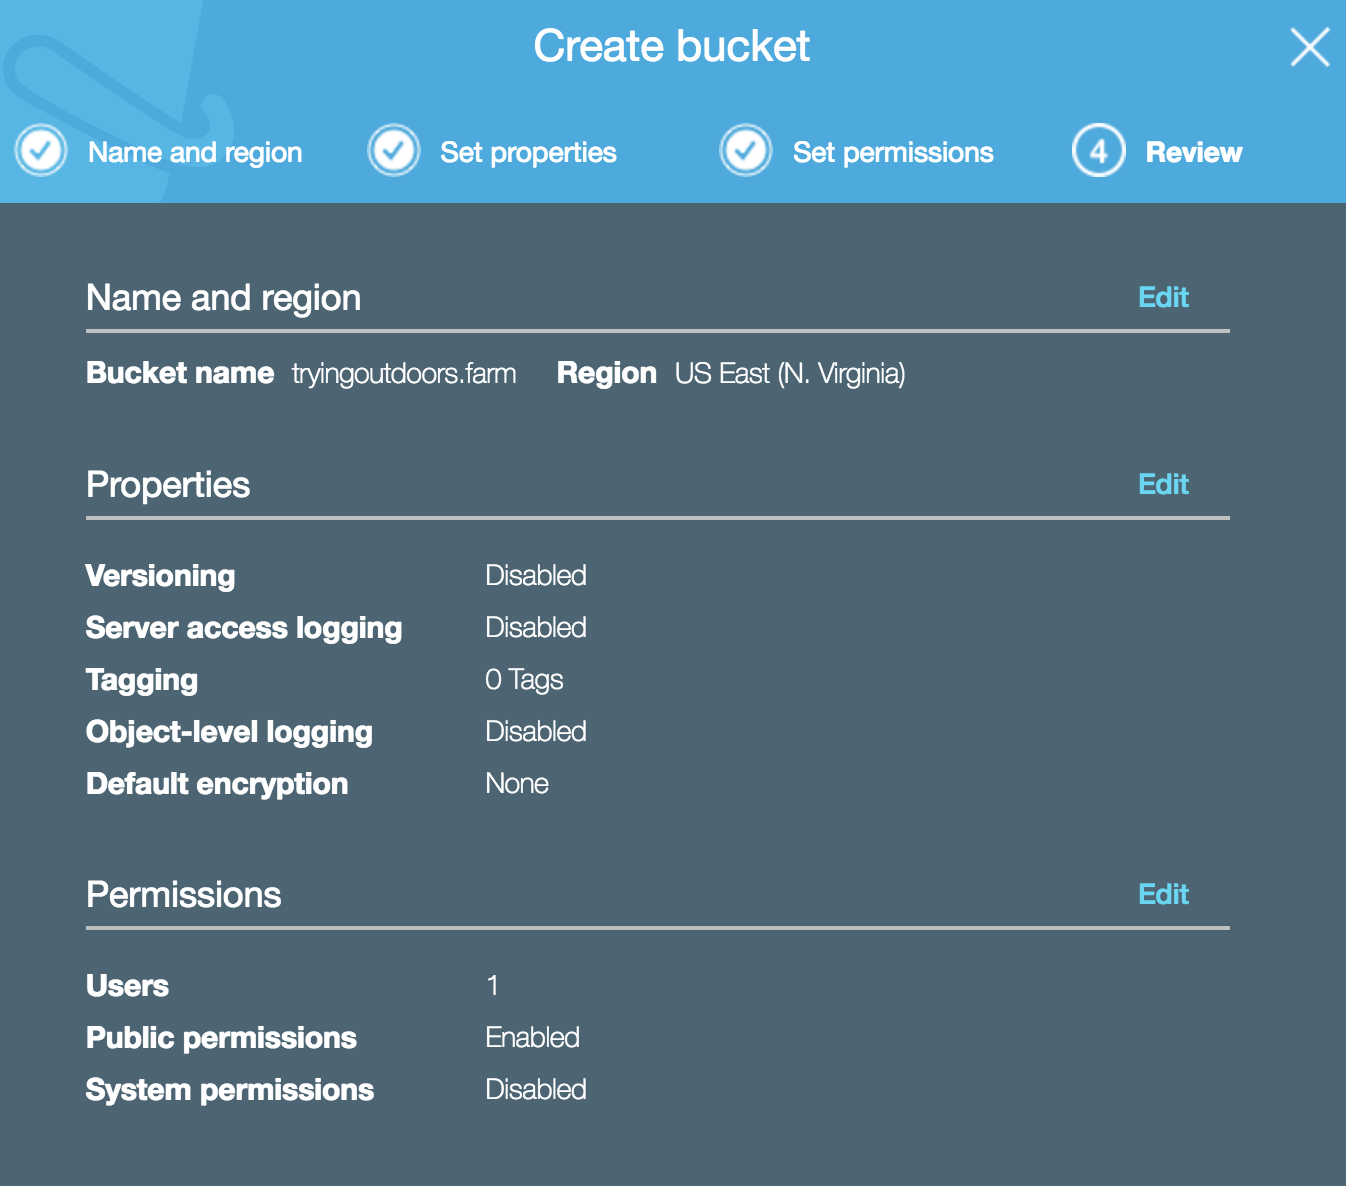
Finally, in the modal steps you get to review what you want to do. Make sure the bucket name is the name of your url, tryingoutdoors.farm in this example. Also make sure that public permissions is Enabled. Hit the create/save button and you are good to go.
Now you should have a public s3 bucket with the name of your domain name. Since it has public read permissions it will probably look like below, as a line item.

Go ahead and click into the bucket, and you will see tabs close to the top with Overview, Properties, Permissions, and Managment. Click on the Properties tab.

In the Properties tab look for the square box that says Static website hosting so we can configure it properly.
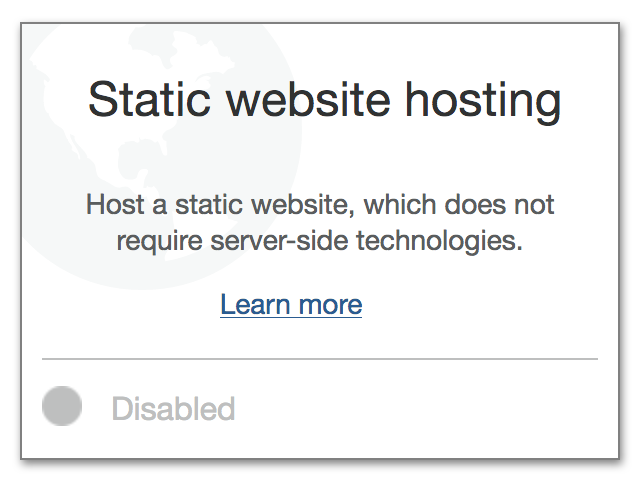
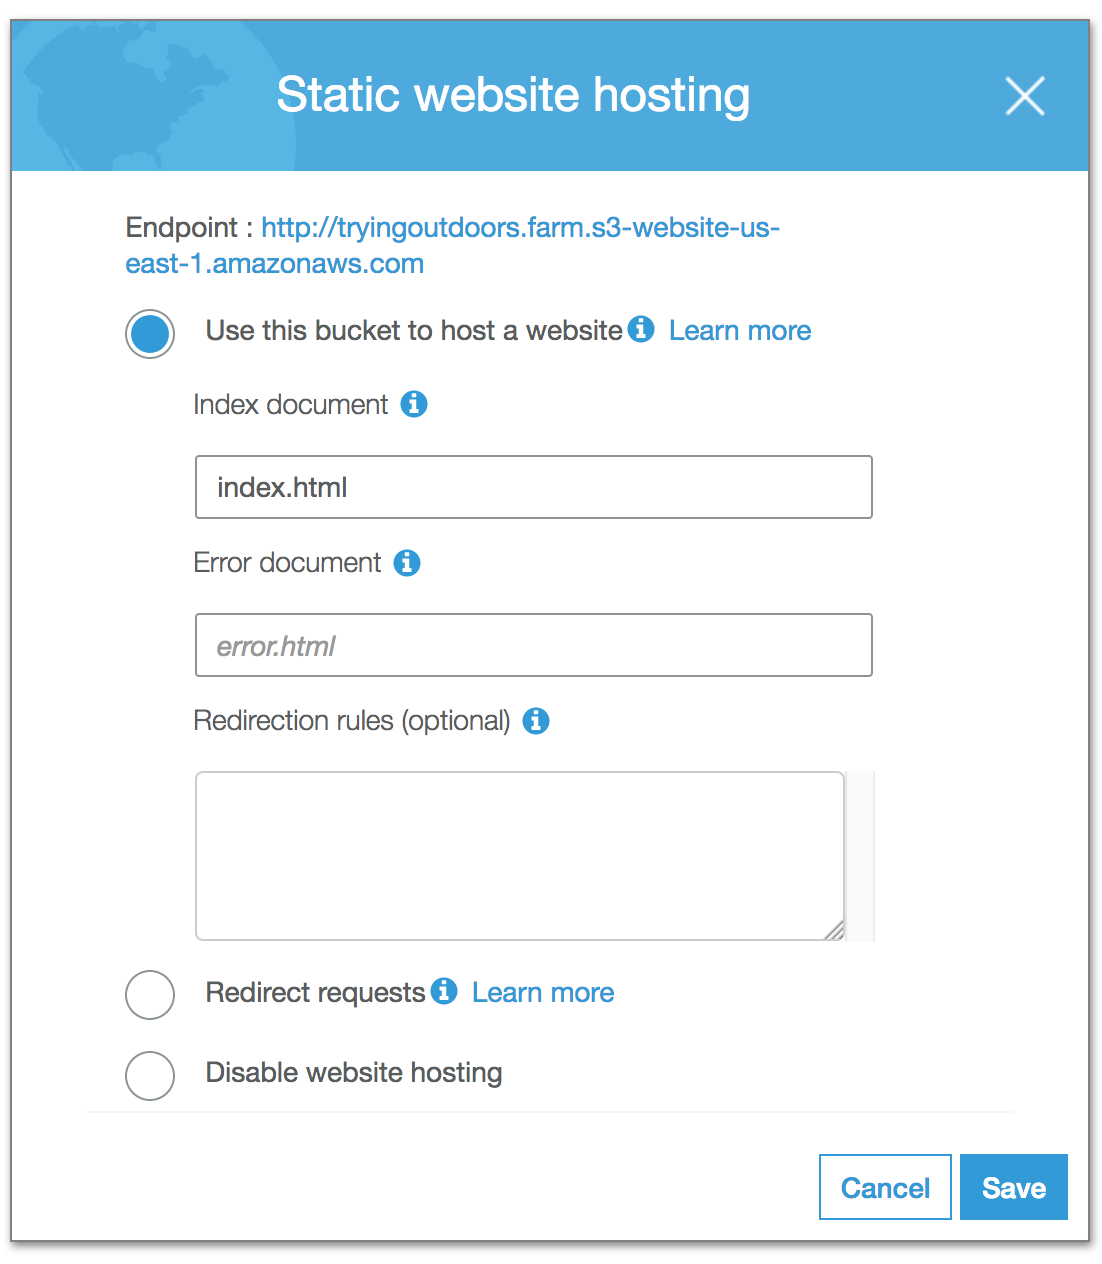
First save off the Endpoint you will need it later. For setup we want to select Use this bucket to host a website. For the Index document we want to use index.html since this will be the html page that will load up as the home page. Once that is done click on save.
Now that we are at this point we are 90% done with setting up a bucket. So far it has been easy stuff. At this point we could set the content policy of the bucket and the endpoint would be good to go and we could start hosting our static site.
However, we want to go ahead and forward www to our root site. To do this we want to follow the following above steps.
- Create bucket with the
wwwversion of your site. Ex.www.tryingoutdoors.farm - Don't worry about it being public
- Open bucket properties
- Click on the
Static web hostingbox
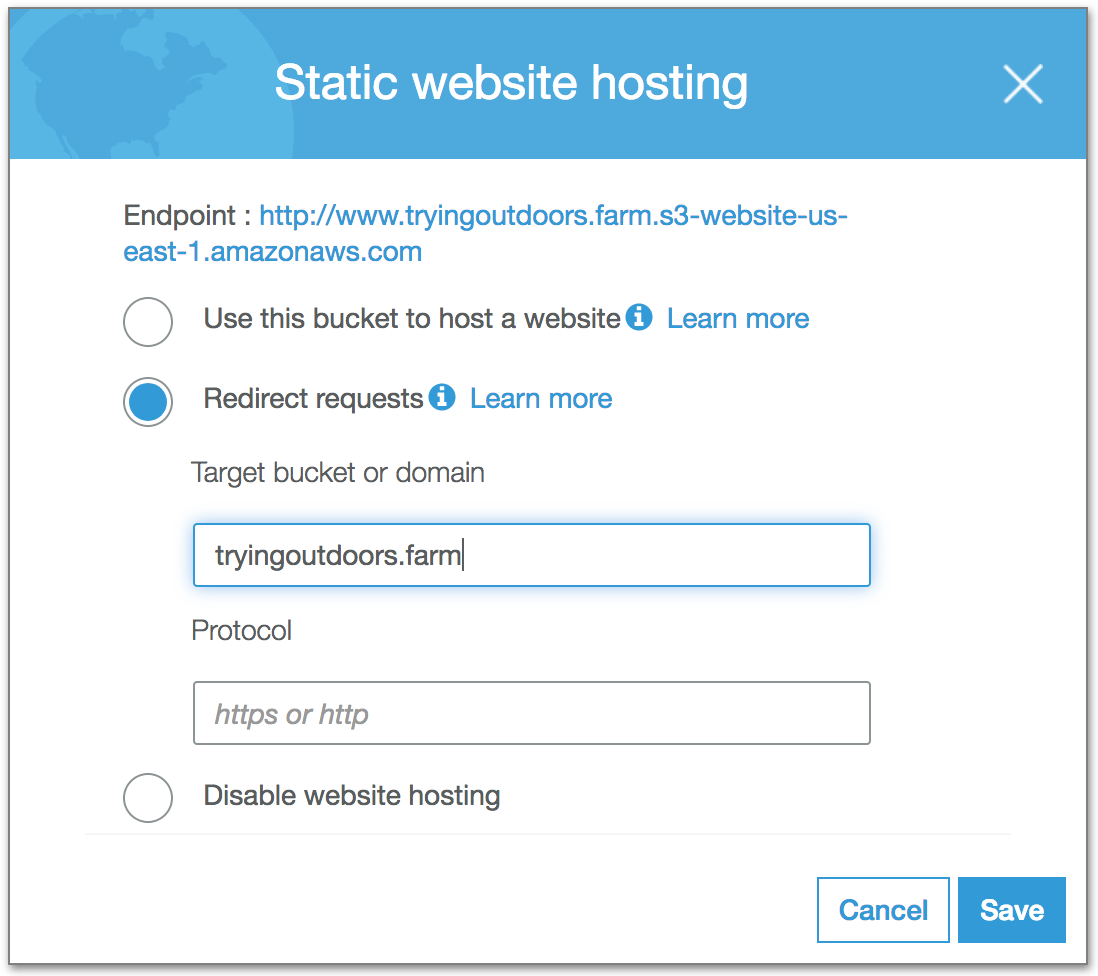
The 4 steps above you have already done so now we just change the last thing we did. We want to select Redirect Requests and add in the url to redirect to. the root of your site. In this case tryingoutdoors.farm. So once we setup DNS for www.tryingoutdoors.farm to point to this bucket it will then redirect to tryingoutdoors.farm instead of loading anything up.
Now for the last couple of steps for configuring the bucket we want to go ahead and open up the permissions tab for the tryingoutdoors.farm bucket
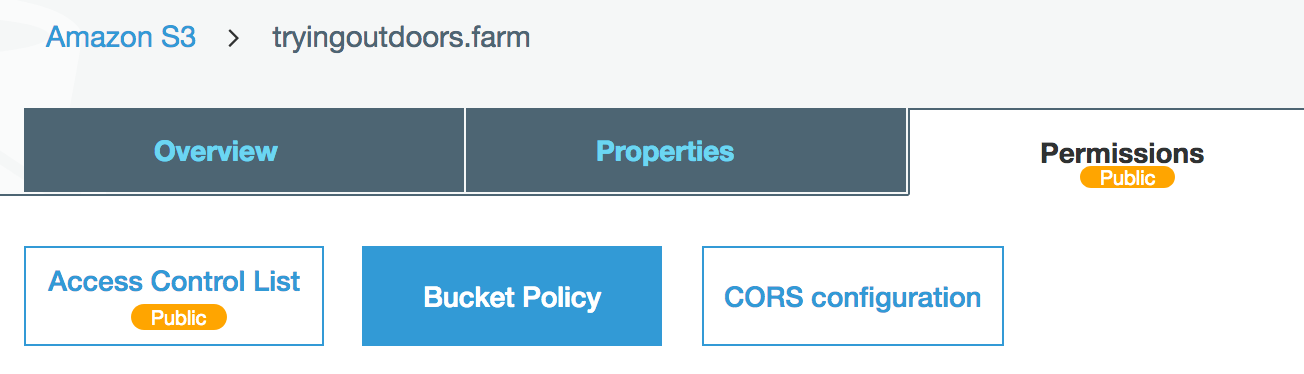
Next we want to set the Bucket Policy so that we allow anyone to be able to read our content.
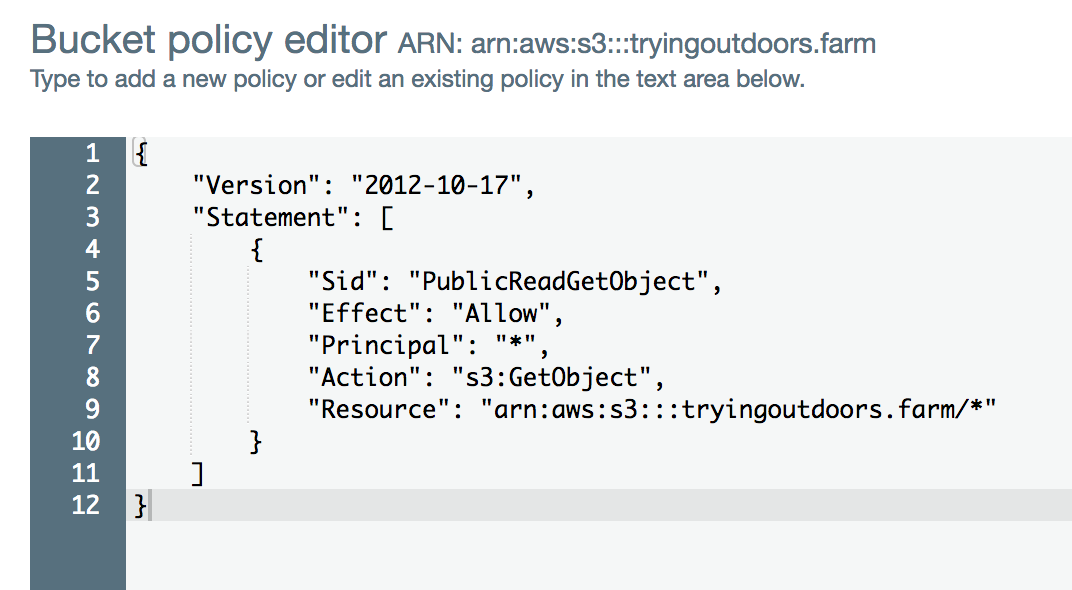
Here is the code from above you can copy and paste. Just remember to change <your_domain>.farm to your domain name.
{
    "Version": "2012-10-17",
    "Statement": [
        {
            "Sid": "PublicReadGetObject",
            "Effect": "Allow",
            "Principal": "*",
            "Action": "s3:GetObject",
            "Resource": "arn:aws:s3:::<your_domain>.farm/*"
        }
    ]
}
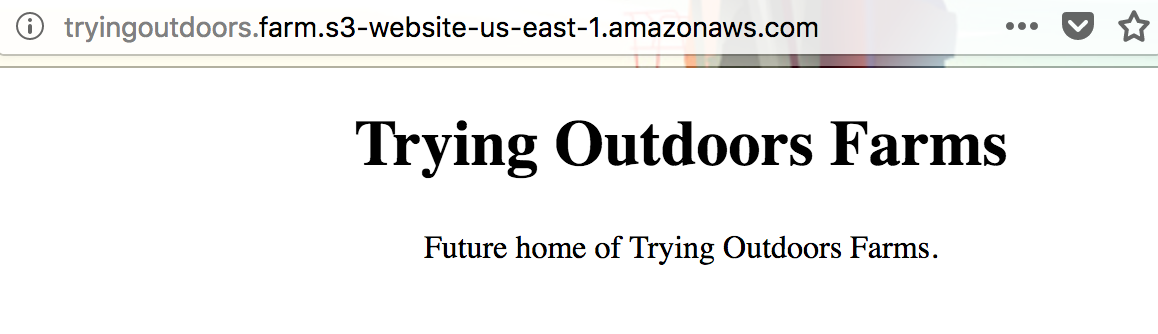
Finally, take that endpoint url you saved off earlier and open it up in the browser after you upload your index.html file to your domains bucket. You should now see your site working.
Add Server Certificate
Now it is time to get our free SSL Cert that autorenews and autoreloads on expiration, isn't that cool. First, open up Certificate Manager and you will be presented with a few buttons, key being Request a certificate. Clickt that one.

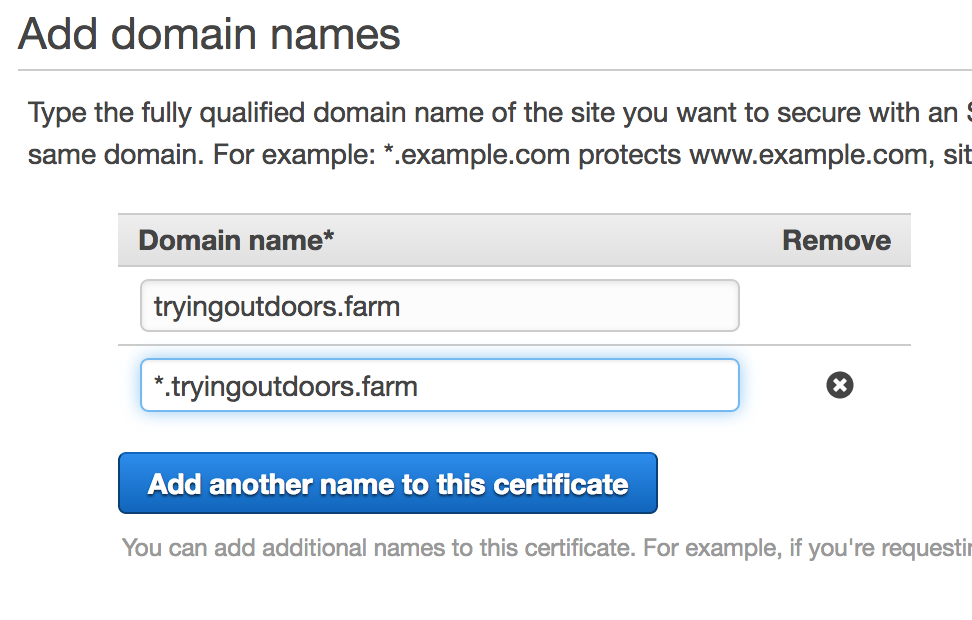
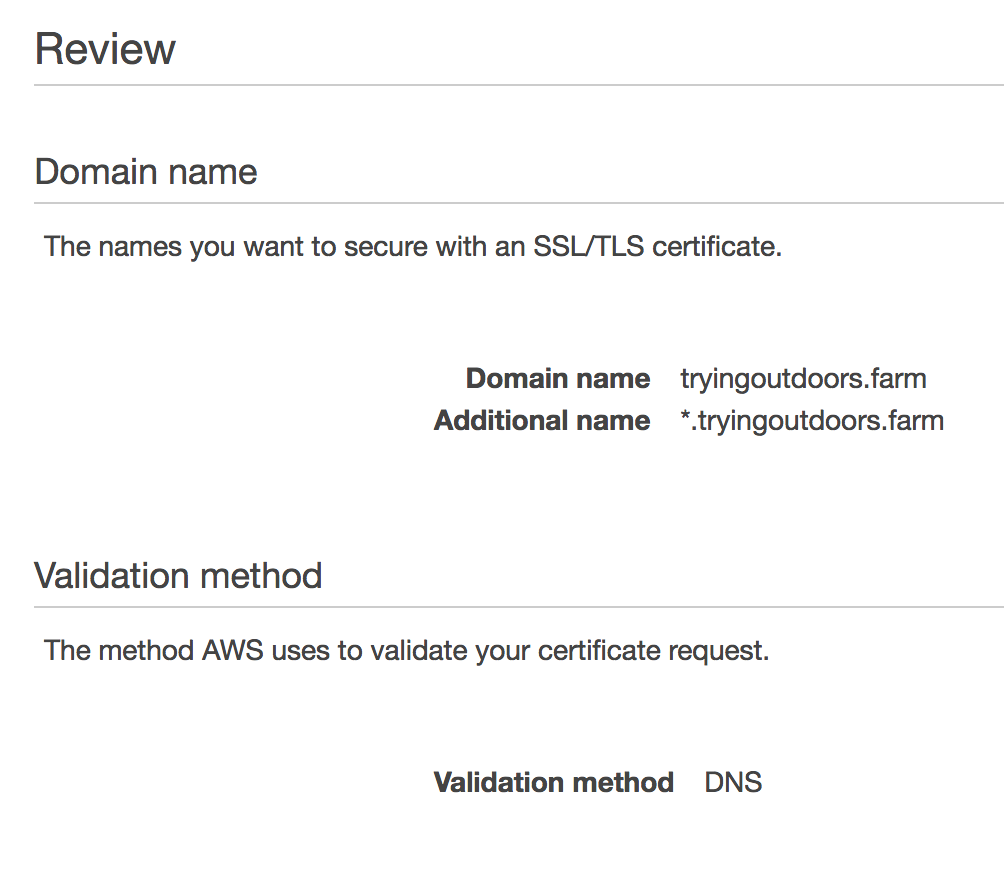
You will be presented with a new page to set up your urls you want used with a certificate. In this case we will use the root of our site, and *. to get the rest of our subdomains to work.
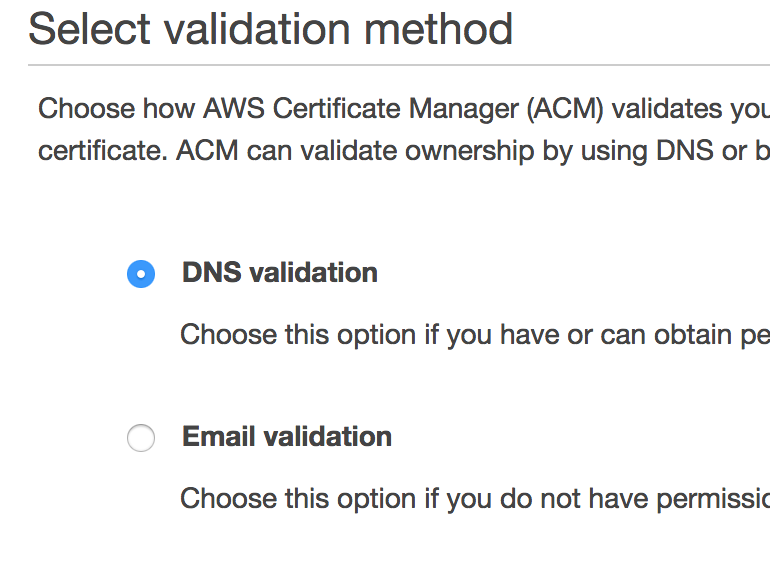
Next we will select that we want to do DNS Validation instead of email validation.
Finally, review that we are doing the urls we are expecting and doing DNS Validation.
Once that is done we will be presented dns settings to set with our domains. I recommend you use Route53 for your DNS needs. If you do all you need to do is click the Create record in Route 53 to set the proper dns settings.
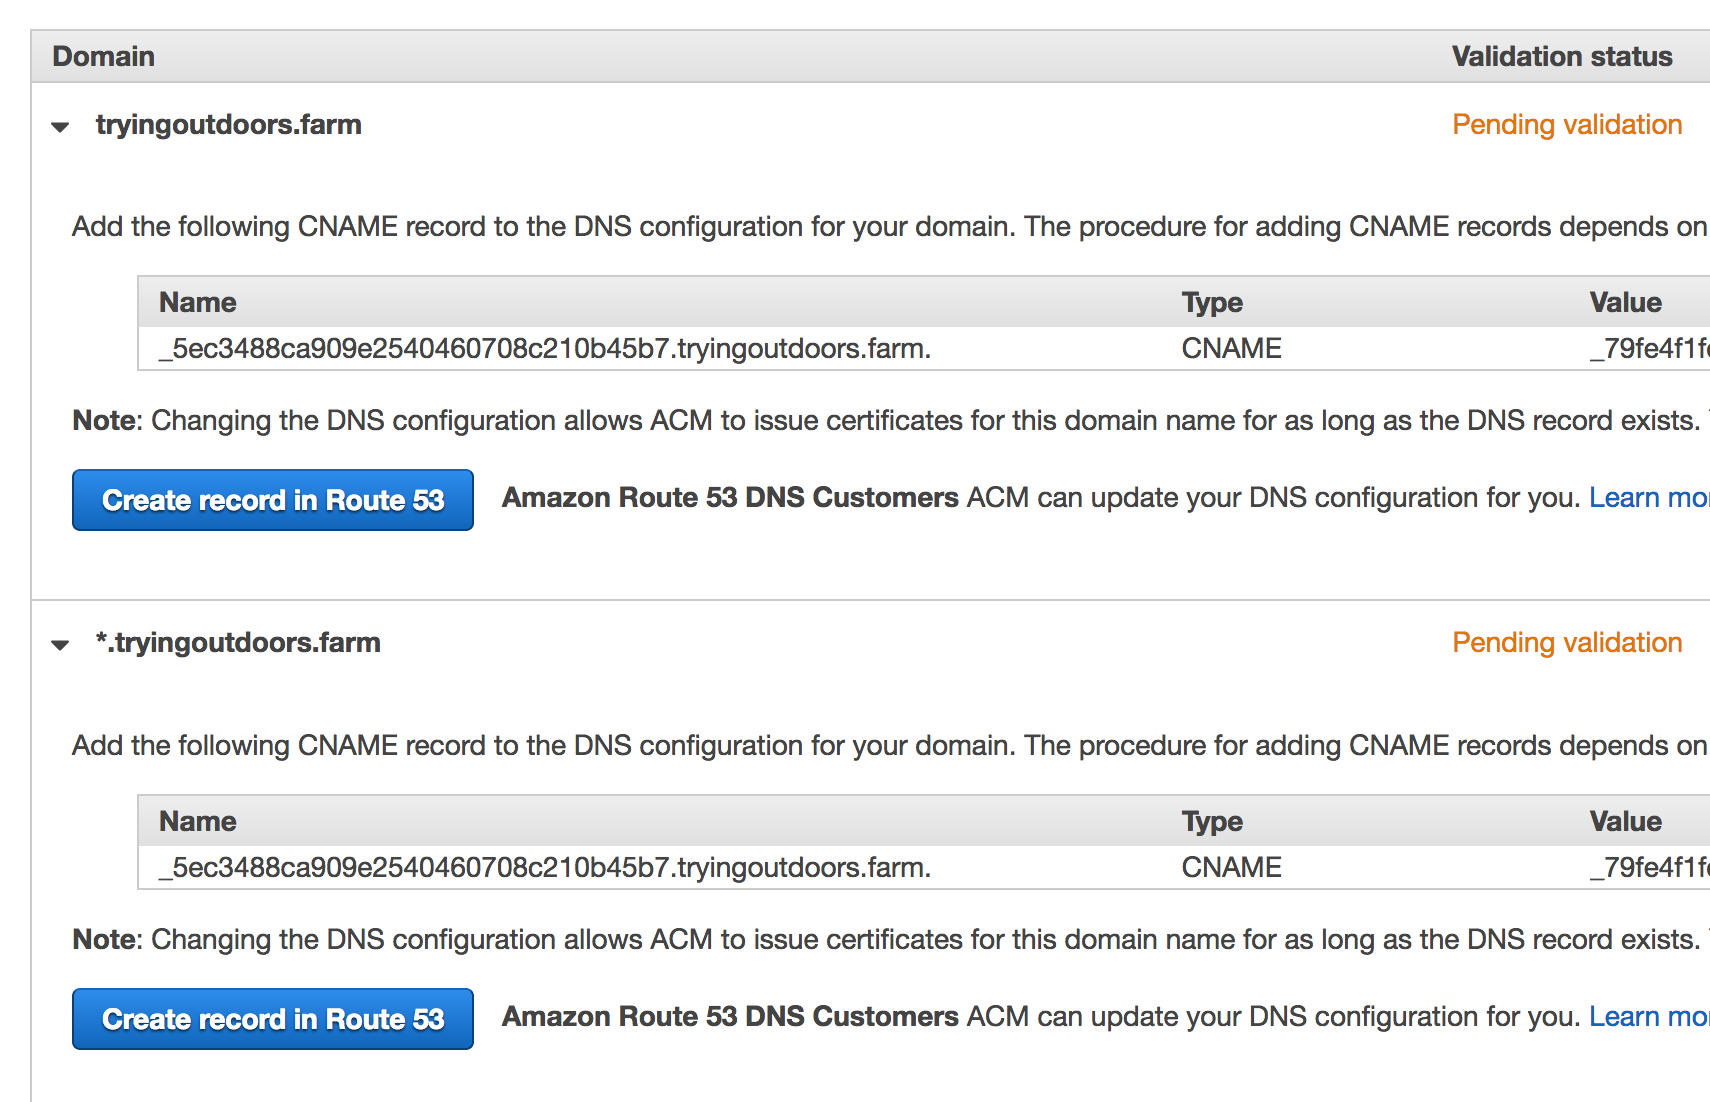
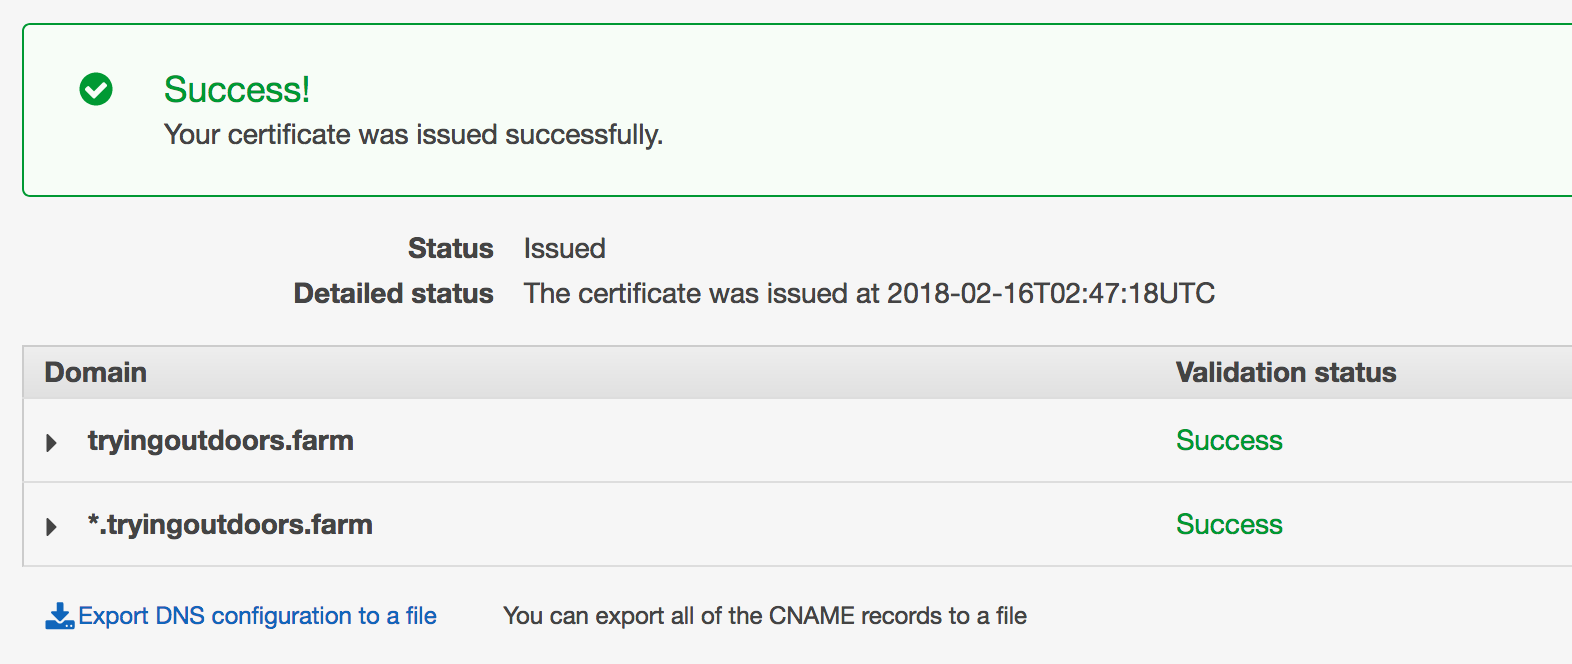
Wait anywhere from 5 to 30 minutes, usually, and the certficate manager should validate the dns settings. Once it is validated it will issue your certificate, and you are ready to start using it with your other AWS services.
One of the reasons to have DNS validation set is so that when it comes time to renew the certificate it will "just work". If we do email validation it will send an email to us every year and we would have to remember to click the link in the email, and not forget.
CloudFront Setup
Now comes the glue that brings together the s3 bucket and your new certificate for your domain name.
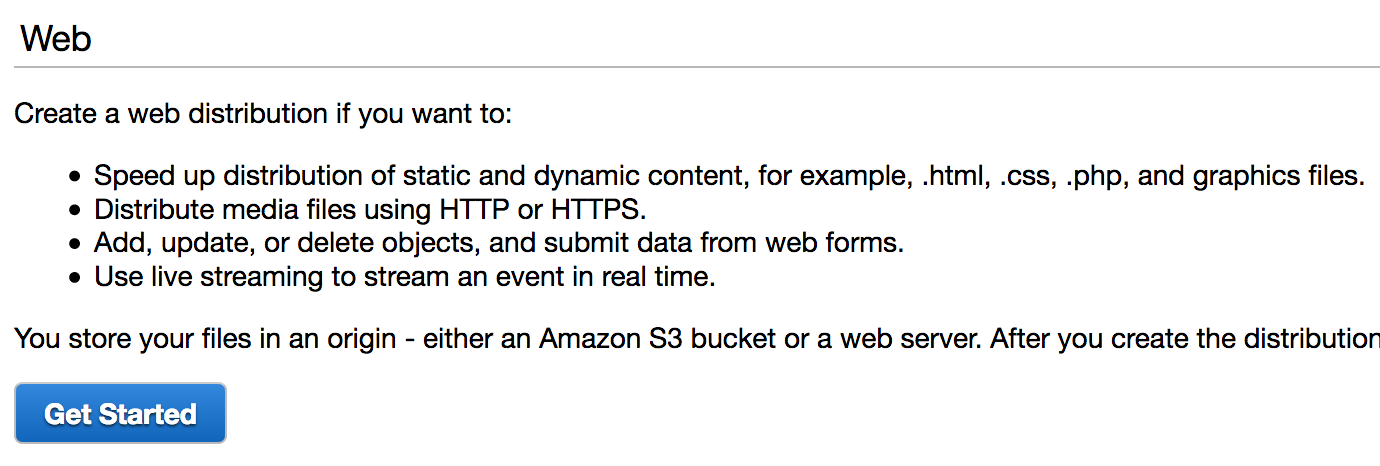
CloudFront runs as distribution's which give it a set of settings and instructs our CDN how to do deal with requests. So to start we need to create a new distribution so just simply click on Create Distribution.

You are going to get a confirmation page, go ahead and click on Get Started.
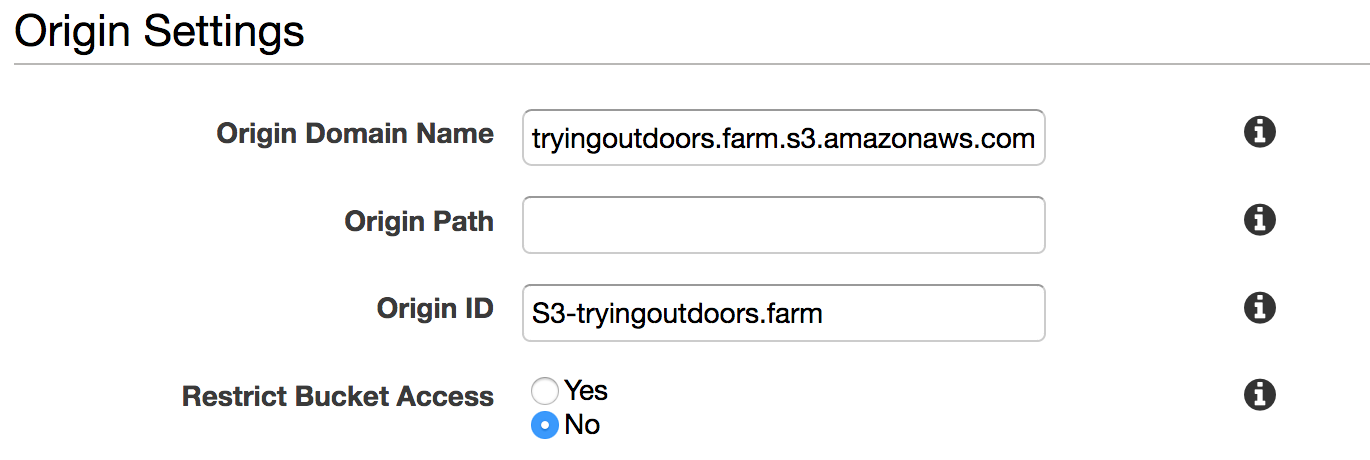
For Origin Domain Name set the URL of the s3 bucket we created earlier. The rest is fine.
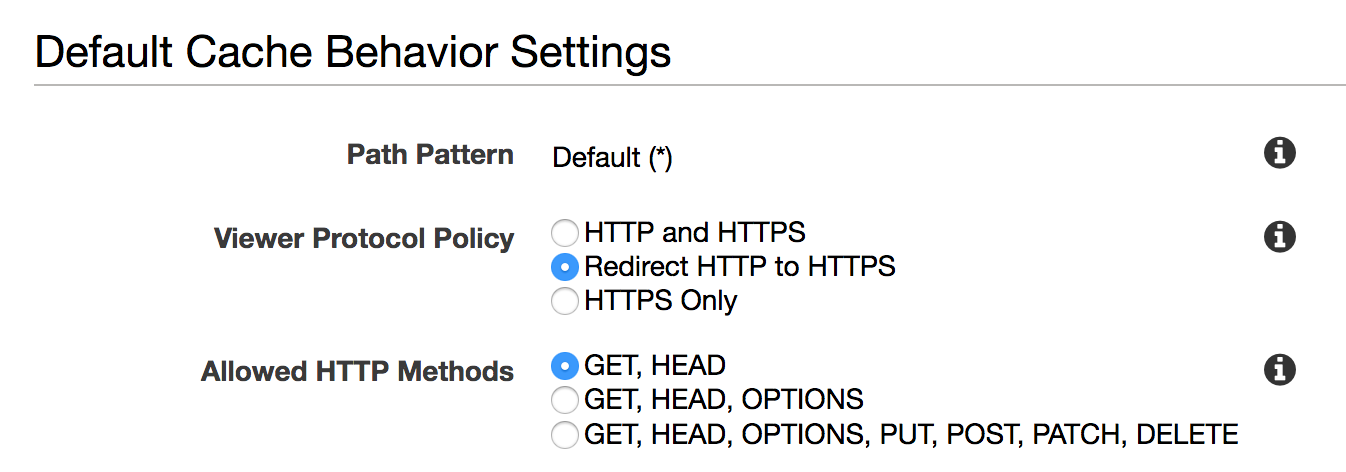
Since we want to have http and https requests return back content we need to set our distribution to redirect all http requests to https so something is returned when people don't use http.
Now that we have our request routing figured out we need to permit specific HTTP Verbs. In our case we just want GET and HEAD since we aren't going to be pushing anything to our webserver.
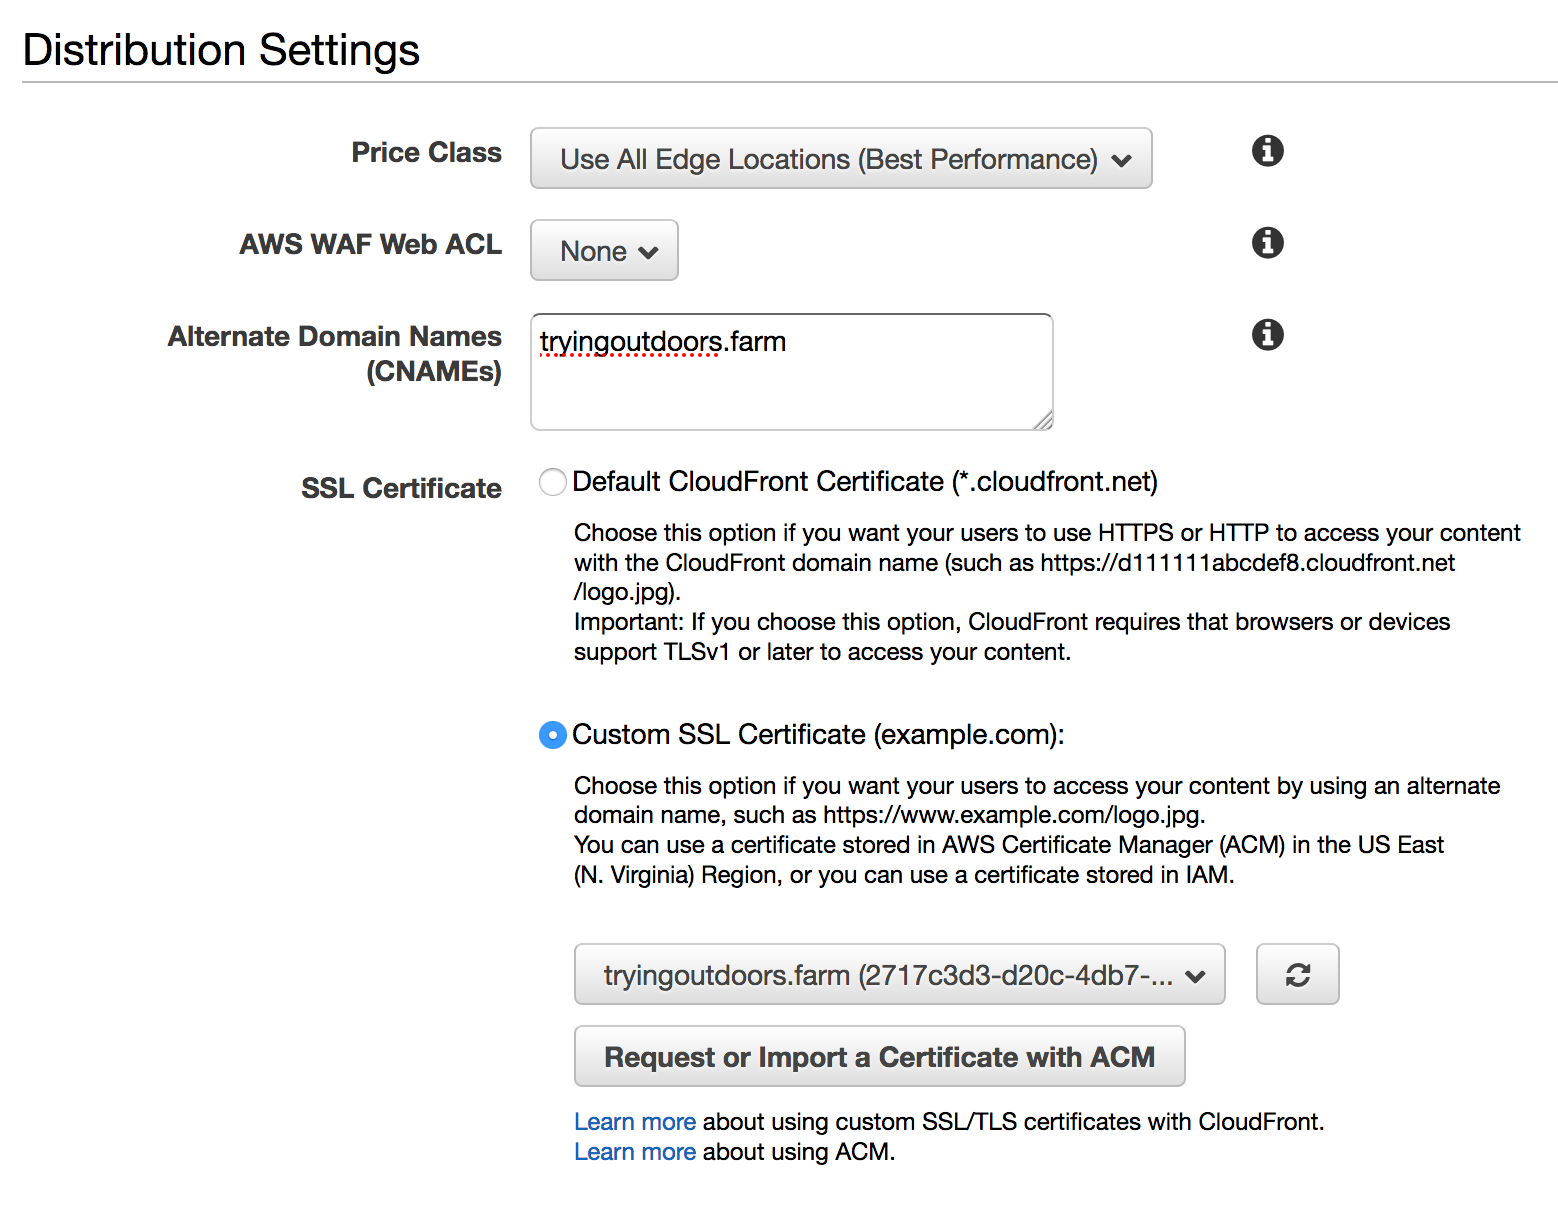
Probably the most important part of this section is this, set the Alternate Domain Names (CNAMES) to your domain name. In this case tryingoutdoors.farm. This is going to let our distribution know to use these urls. Also be sure to select Custom SSL Certificate, and choose your cert from the dropdown available.
Finally, find the section Default Root Object, and set it to index.html. This sets our system be like a standard server to load up index.html if / is requested.

At this point go take a break, get some tea, go for a walk, maybe go to bed for the night. Hopefully, now that you are back in the morning the distribution is up and running. Basically, the distribution can take a while to set up.
Final DNS Setup
Finally, we are ready to wrap up by pointing our dns for tryingoutdoors.farm to our distribution and www.tryingoutdoors.farm to tryingoutdoors.farm. As noted we are pointing our root url to our CloudFront Distribution that we just setup. We are goint point our www to an s3 bucket so which is configured to redirec to our root site.
First, step is open up Route 53 and select your domain.

Next we want to click on Create Record Set so we can add our configurations.

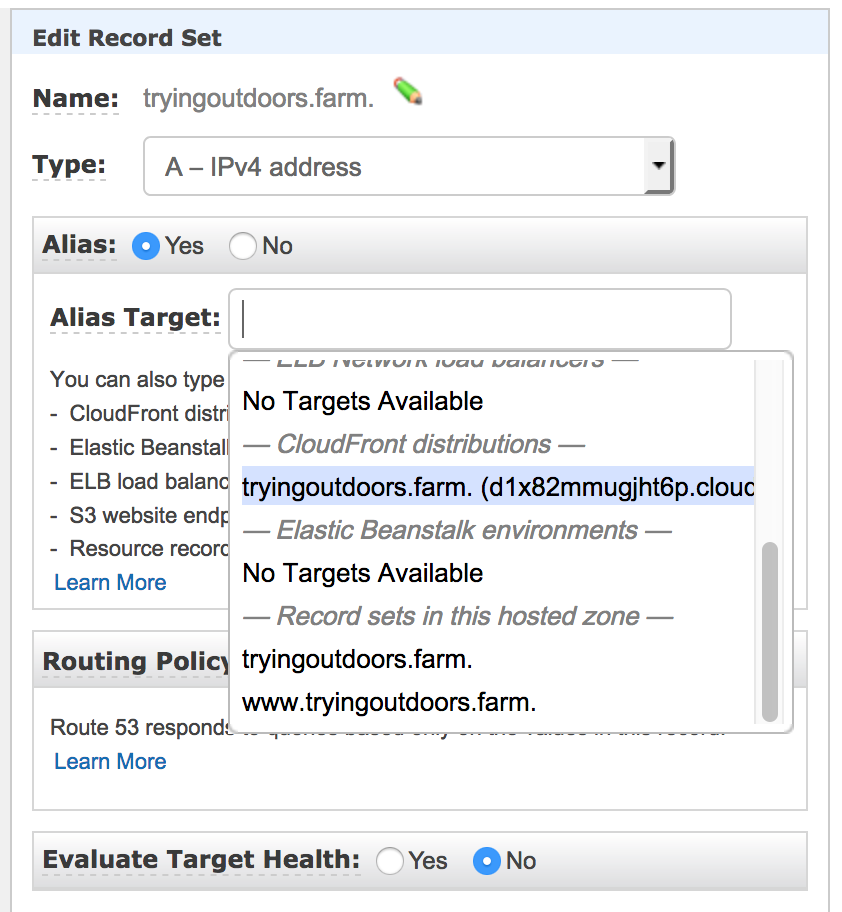
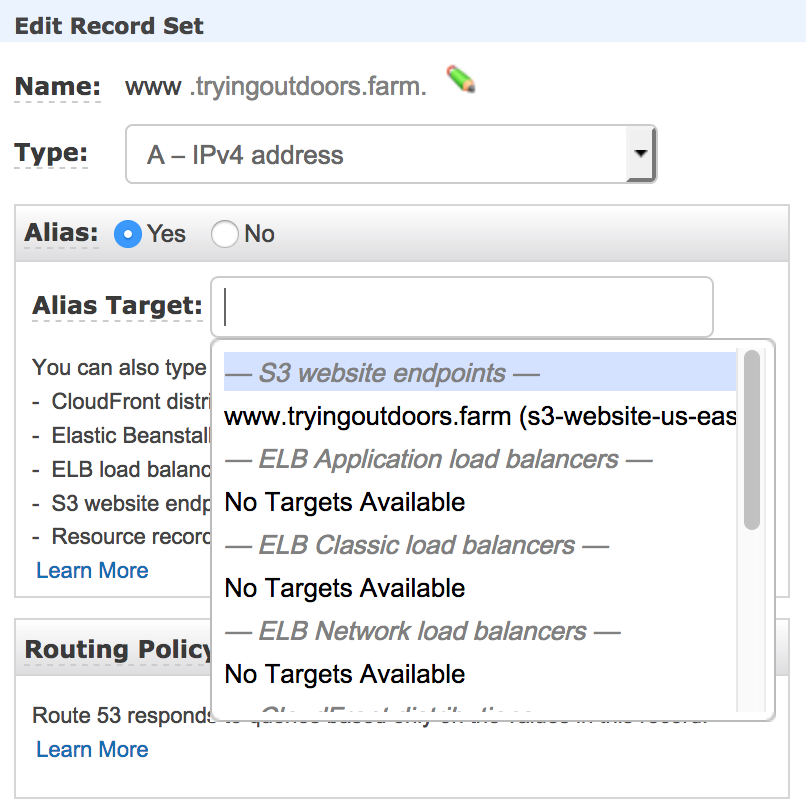
Now on the right side of the page you should see a new window that looks similar to below. Leave the textbox at the top blank so we are setting the route.
Choose type of record as A - IPv4 address and select Yes for Alias. At this point you should be able to click on Alias Target and a dropdown should appear. Just scroll through it and look for your CloudFront Distribution for your url and select it. Then go down and hit save. You have successfully configured the root of the site.
Now got through the same steps to create a new record and point your www to an A - IPv4 address alias of your www s3 bucket in the dropdown and click save.
Now all you need to do is wait, hopefully not long, as all the DNS updates everywhere. Once your dns is updated try browsing your site and it should be behind an SSL certificate. It should also be blazing fast.
Final Thoughts
There were a lot of steps to get this all setup. However, once you get through it once, it is a lot easier, and it makes a few AWS things make a bit more sense. The great thing is you now have an SSL backed site for super cheap compared to paying for a server and a site certificate.
I will say there is one caveat to doing all this to be aware of. When you push a new blog post or update to your site, it might take a bit to load as it propagates out to the world accross the CDNs. It isn't instant like it would be if you were reading directly from an s3 bucket.
With that I hope more people start using SSL on their sites.